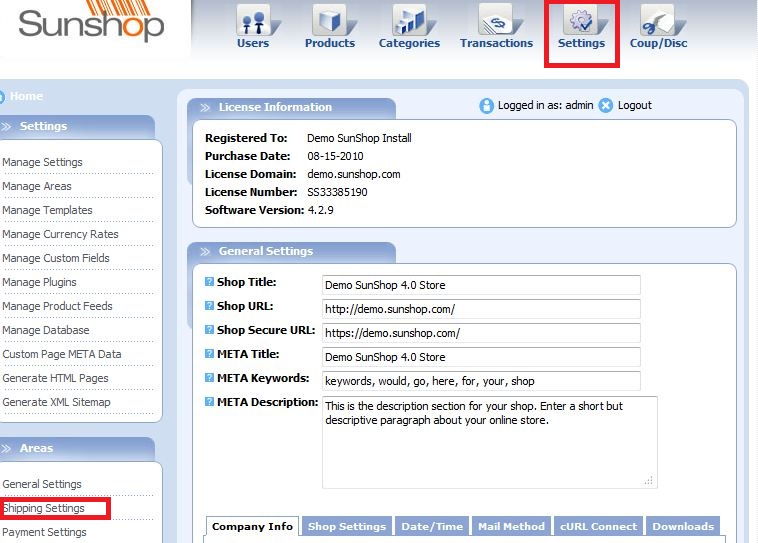
Go to the shipping settings area by clicking on "Settings" at the top of your administration area, then "Shipping Settings" over to the left.
Next, make sure you choose "Shipping Zones/Table" as the ACTIVE SHIPPING METHOD, the drop down selection at the top. For the SHIPPING TABLE RANGE, you can decide if you want to calculate rates by total WEIGHT of the order (Weight), or the total COST of the order (Total Order). For this example, we will go with total weight.
Click the "Edit Settings" button to save your changes.
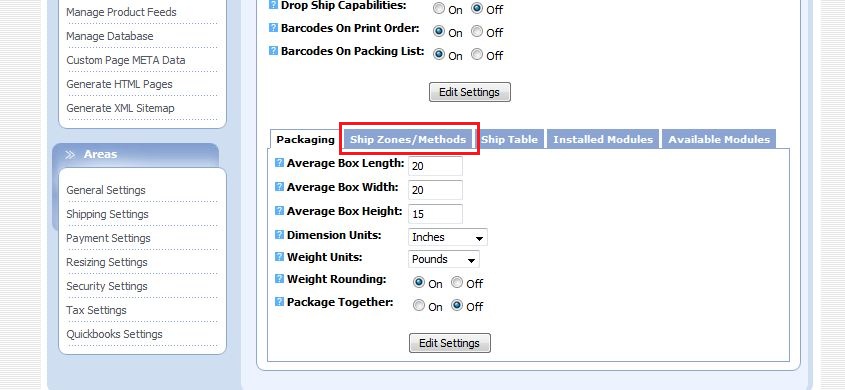
Now, look a bit below that button, and click on the "Ship Zones/Methods" tab.
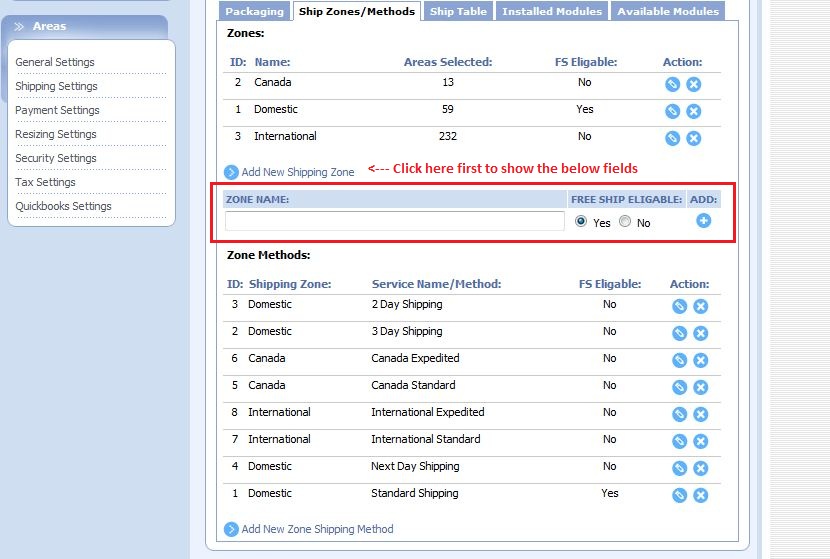
Under "Zones", click the Add New Shipping Zone link. Call the "ZONE NAME" something like "Domestic" and adjust the free shipping eligibility (your choice). Then click add. You will then be prompted to choose the actual zones. If you're setting up rates for a single country, choose ONLY that country. If you're setting up rates for a specific state, choose ONLY that state.
Do not choose a state/province and its matching country. To choose multiple selections, click a state/country to highlight, hold down the CTRL key (Windows) or the CMD key (Mac), then click your other choices.
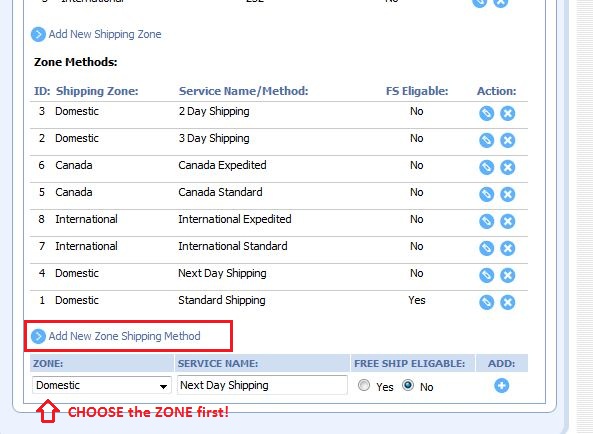
After this, click the "Add New Zone Shipping Method" at the bottom of this same area and under the ZONE drop down, choose the one you just added. Call the service name something like Next Day Shipping and click Add.
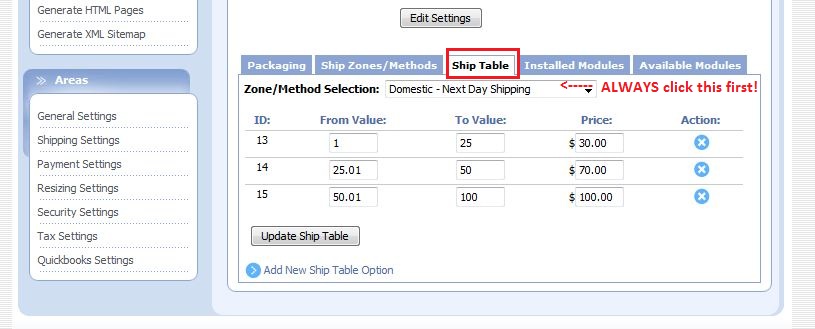
Finally, click the blue "Ship Table" tab and under the "Zone/Method Selection:" drop down, select the one you just added. Click the "Add New Ship Table Option" at the bottom and add your values accordingly. So if you wanted all domestic shipments to be 30.00 when the total weight of the order is 1 to 25 pounds, then the first value must be "1", the second is "25", and the price is 30.00. Use the image below to guide you when adding the other values.
Click the "Update Ship Table" button to complete.

